

Quick Summary
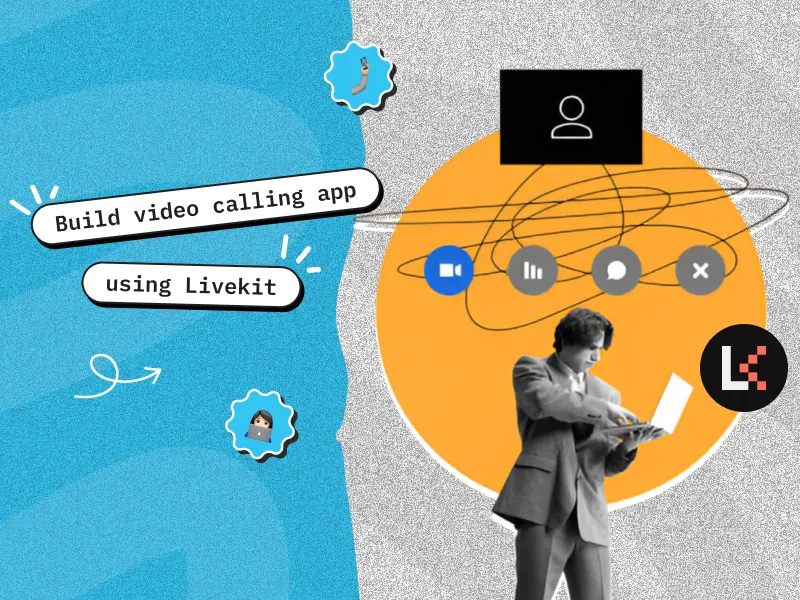
In this comprehensive guide, you’ll learn how to build and deploy a real-time video calling using the LiveKit platform. We’ll cover all necessary components, including setting up LiveKit on a cloud VM, configuring API tokens for secure access, and integrating LiveKit SDKs into both web and mobile applications. You’ll also get tips for optimizing performance, handling errors, and ensuring scalability for production environments. By the end of this guide, you’ll have a fully functional video chat or calling app capable of connecting users across platforms with minimal setup.
Introduction:
Building a cutting-edge video conferencing app can seem like a daunting task, but with the right tools and framework, it becomes an achievable goal. This guide walks you through the process of building a real-time video calling app using the powerful LiveKit platform.
LiveKit offers an easy-to-integrate solution for WebRTC, enabling developers to seamlessly connect users across various devices. Whether you’re looking to create a full-featured video conferencing platform, LiveKit provides all the necessary components—from backend infrastructure to mobile SDKs—to help you deploy your application in no time.
For businesses seeking expert guidance, a node js development company can provide the technical expertise needed to integrate and scale your video communication platform. In this guide, we’ll cover all the steps required, from deploying the server to integrating with mobile apps, ensuring that you’re fully equipped to launch your video communication platform.
Prerequisites
To successfully deploy and use LiveKit, you will need the following components:
- LiveKit: Server & Client SDKs
- Node.js: Web Backend
- Flutter: Mobile Application
- AWS Infrastructure: Including ECR, Redis, Elastic Load Balancer
- Domain Setup: A primary domain for LiveKit, along with two subdomains for STUN & TURN
- SSL Setup: Proper SSL configuration is required for secure communication
Deploying LiveKit to a Virtual Machine (VM)
This guide provides a step-by-step process for deploying a production-ready LiveKit server on a cloud-based virtual machine.
Prerequisites
Before proceeding, ensure you have:
- A domain that you own
- Access to modify DNS records for your domain and subdomains to point to your LiveKit server
Step 1: Generate Configuration Files
To create a custom configuration for your domain, use the LiveKit configuration generation tool. Run the following commands on your development machine:
docker pull livekit/generate
docker run --rm -it -v$PWD:/output livekit/generate
The tool will create a folder named after your domain containing the following files:
- caddy.yaml
- docker-compose.yaml
- livekit.yaml
- redis.conf
- init_script.sh or cloud_init.xxxx.yaml
For more information, refer to the LiveKit Documentation
Step 2: Important Configuration Settings
Ports:
The main TCP port for the RoomService and RTC endpoint is 7880. For production setups, this port should be placed behind a load balancer with TLS configured.
Keys:
API key and secret pairs are used for JWT authentication. You must configure these keys to allow the server to generate access tokens and interact with the LiveKit server.
Logging:
Set the log level to one of the following values: debug, info, warn, error. For production setups, consider enabling a sampling algorithm. Learn more
Room Configuration:
- Empty_timeout: Time (in seconds) to keep a room open when no one joins.
- Departure_timeout: Time (in seconds) to keep a room open after all participants leave.
- Max_participants: Set the limit for the number of participants allowed in a room (0 means no limit).
- Enabled_codecs: Specify acceptable video and audio codecs (e.g., video/h264, audio/red).
Audio Settings:
- Active_level: Minimum audio level considered active (range: 0-127, with 0 being the loudest). Default is 30.
- Min_percentile: The percentage of time a participant must exceed the Active_level to be considered active. Default is 40%.
Step 3: Deploy to a VM Using the Startup Script
LiveKit provides a startup script that can be used to deploy to any Linux-based virtual machine (tested with Linode and Google Cloud).
Deployment Steps:
- Start a VM instance.
- Copy the init_script.sh to your VM.
- SSH into the instance and run the installation script:
sudo ./init_script.shOnce the installation completes, the following components will be installed:
- Docker
- Docker Compose
- LiveKit configuration files (located at /opt/livekit)
- Systemd service for LiveKit (livekit-docker)
Starting and Stopping the Service
To manage the LiveKit service via systemctl, use the following commands:
- Start the service:
systemctl start livekit-docker- Stop the service:
systemctl stop livekit-dockerStep 4: Firewall Configuration
Ensure the following ports are open in your firewall to allow proper communication:
- 443: Primary HTTPS and TURN/TLS
- 80: TLS issuance
- 7881: WebRTC over TCP
- 3478/UDP: TURN/UDP
- 50000-60000/UDP: WebRTC over UDP
If Ingress is needed, also open the following ports:
- 1935: RTMP Ingress
- 7885/UDP: WebRTC for WHIP Ingress
Step 5: DNS Configuration
Both the primary and TURN domains must point to the IP address of your instance. This is essential for Caddy to provision your TLS certificates.
Upgrading LiveKit
To upgrade to a newer version of LiveKit, follow these steps:
- Edit the docker-compose.yaml file located at /opt/livekit.
- Update the image field for the livekit service to the desired version:
image: livekit/livekit-server:v<version>- Alternatively, to always use the latest version, set:
image: livekit/livekit-server:latest- Pull the latest image:
docker pull livekit/livekit-serverNote: Ensure that your DNS is correctly pointing to your server. Use the host <yourdomain> command to verify that the DNS resolves to the correct IP address.
Generating Tokens using Node.js
To generate JWT tokens required for LiveKit authentication, follow these steps:
Step 1: Install LiveKit Server SDK
Install the LiveKit Server SDK via either Yarn or npm:
- Yarn:
yarn add livekit-server-sdk- npm:
npm install livekit-server-sdk --saveStep 2: Configure API Keys
Create a .env file to store your API Key and Secret:
export LIVEKIT_API_KEY=<your API Key>
export LIVEKIT_API_SECRET=<your API Secret>
Step 3: Create a Token Generation Endpoint
Create a simple server using Express to generate tokens. Here’s an example implementation:
import express from 'express';
import { AccessToken } from 'livekit-server-sdk';
const createToken = async () => {
  const roomName = 'quickstart-room';
  const participantName = 'quickstart-username';
  const at = new AccessToken(process.env.LIVEKIT_API_KEY, process.env.LIVEKIT_API_SECRET, {
    identity: participantName,
    ttl: '10m', // Token expiry
  });
  at.addGrant({ roomJoin: true, room: roomName });
  return await at.toJwt();
};
const app = express();
const port = 3000;
app.get('/getToken', async (req, res) => {
  res.send(await createToken());
});
app.listen(port, () => {
  console.log(`Server listening on port ${port}`);
});
Step 4: Run the Server
Load the environment variables and run the server:
$ source development.env
$ node server.js
Token Example
Here’s an example of a decoded join token:
{
  "exp": 1621657263,
  "iss": "APIMmxiL8rquKztZEoZJV9Fb",
  "sub": "myidentity",
  "nbf": 1619065263,
  "video": {
    "room": "myroom",
    "roomJoin": true
  },
  "metadata": ""
}
For more details on the decoded body and video grants, refer to the LiveKit documentation.
LiveKit Setup for Flutter
This guide will walk you through integrating LiveKit into your Flutter application.
Step 1: Install LiveKit SDK
Add the LiveKit SDK to your Flutter project by updating pubspec.yaml:
dependencies:
  livekit_client: <Version> # Check the latest version on pub.dev
Run the following command to fetch dependencies:
flutter pub getStep 2: Set Platform-Specific Permissions
For Android, update the AndroidManifest.xml file to request necessary permissions:
<uses-permission android:name="android.permission.CAMERA" />
<uses-permission android:name="android.permission.RECORD_AUDIO" />
<uses-permission android:name="android.permission.INTERNET" />
<uses-permission android:name="android.permission.ACCESS_NETWORK_STATE" />
For iOS, update the Info.plist file to include the following usage descriptions:
<key>NSCameraUsageDescription</key>
<string>We need access to your camera for video calls.</string>
<key>NSMicrophoneUsageDescription</key>
<string>We need access to your microphone for audio calls.</string>
<key>NSLocalNetworkUsageDescription</key>
<string>Required for real-time communication with the server.</string>
Step 3: Initialize and Configure LiveKit Room
Follow the LiveKit documentation to set up and manage the LiveKit room, event listeners, and media options.
For full integration details, refer to the LiveKit Flutter SDK documentation.
Best Practices for Production
- Token Security: Always generate room tokens server-side to prevent unauthorized access.
- User Feedback: Provide real-time UI indicators for participant status (e.g., mute, camera).
- Error Handling: Implement user-friendly error messages to handle connection issues.
- Optimize Bandwidth: For weak networks, use lower resolution video settings.
Scalability Considerations:
For optimal performance, ensure your server is equipped with sufficient CPU power and bandwidth. Production environments should use high-performance compute-optimized instances with at least 10Gbps Ethernet.
Conclusion:
Building a seamless video calling app has never been easier, thanks to the powerful tools and resources provided by LiveKit. With its robust SDKs, comprehensive documentation, and scalable infrastructure, developers can quickly deploy real-time communication solutions across web and mobile platforms. However, integrating such a solution with the required backend expertise can still be challenging for those unfamiliar with advanced development practices. This is where hiring professionals can make a difference.
If you’re looking to streamline the development process and ensure a flawless implementation, hire Node.js developers with expertise in LiveKit integration. Skilled developers can help you configure APIs, optimize server performance, and enhance scalability, enabling your video calling app to deliver exceptional user experiences. With the right team and tools, your vision for a cutting-edge communication platform can become a reality in no time.
References:


 30 mins free Consulting
 5 min read


 Love we get from the world